
Installing your 1901 sink is fairly straightforward, and most cabinetmakers are familiar with the installation of traditional style Butler and Belfast sinks. We recommend discussing the installation with them before purchasing your sink.
1901 sinks are usually installed undermounted (excluding Lab sinks, which are drop in/inset sinks). This is where the benchtop sits on the top edge of the sink and usually overhangs the sink by approximately 10mm. The benchtop will have a cut-out for the sink, and usually the face of the sink will be exposed.
Please ensure you receive your sink and measure it before cabinet and benchtop construction. Fireclay is hand finished and the measurements of our sinks can vary up to 2%.
Support
1901 sinks do not require any particular special supports, however for a little extra strength we advise using a slat of melamine or timber underneath each side of the shelf on which the sink is mounted.
Sealing
Use a flexible sealant, like kitchen silicone, at the junction of the sink and the benchtop. This will stop water running under the bench and provide stability, fixing the sink to the bench.
It is very important to ensure this sealant is flexible, especially if your benchtop is stone. This will allow the sink and stone to contract and expand separately. Using a rigid adhesive will void the warranty.
Plumbing & Waste Installation:
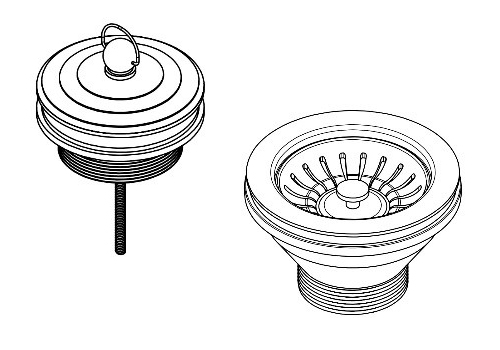
Your 1901 sink will be supplied with all required fittings for connection to drainage. These fittings are compliant with Australian standards and accommodate any overflows as required. This is a quick and easy process and your plumber should have no problems connecting these to standard plumbing fittings.
Ensure you use some silicone sealant between the flange of the stainless steel waste (the part you will see in the sink around the plug) and the sink itself. This is vital as it will prevent water draining under the flange. We recommend cleaning the surfaces with a cloth and some mineral turps, which will help the silicone adhere. Before the silicone dries, use the same cloth to clean any excess silicone that squeezes out when tightening the waste fitting.
The waste fitting should be tightened by hand from underneath the sink – please take care not to over-tighten the waste, which could cause the sink to crack and is not covered by warranty. If a screwdiver is used to tighten the central screw in the waste fitting, take care not to use excessive force.