



 Restoration Online
Who loves your home more than you? Who else knows how you use your space? No one of course! That is why choosing those functional yet stylish pieces for your space is a job you should feel 100% confident in, however we find that a lot of our customers find this intimidating. Today in part three of our DIY Series we will be focusing on some of our more complicated products such as external door handles & rim locks as well as drop-in & bathroom sinks. As we move into the more advanced products, we will offer some tips to give you confidence when selecting the right parts for your job. And for those daring enough to get their hands dirty, some hints & guides to installing them, pride of place, in your home. If you’re not one for dirty hands, don’t despair! We will give you all the information you need to ask your tradie the right questions and pass on the helpful hints you think they will need. If you happened to miss the earlier parts, you can catch up on them all here.
Door Handles! Hands down our favorite topic! 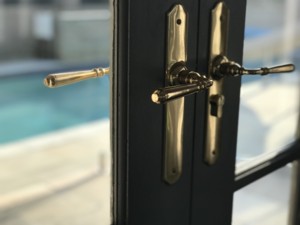 The entry door handle market in Australia has come a long way over the last decade. It was not too long ago that every suburban street was awash with the stock Lockwood or Lane Deadbolt or Night Latch. Today, with the variety of options on type, style and brand, inclduing exciting new brands such as Ageless Iron who are taking classic materials and mixing them with world-class technology to create a high-quality, refined & rustic range of door handles like nothing we have seen before, our choice has never been greater. Though this choice means we can all have the homes of our dreams, we all know the struggles of making choices during a build or renovation - they can be vast and at times overwhelming. So we are here to give you the basics on what you need to know to choose, and if you're handy, install the perfect new entry handle for your home.
+ What is an entry door handle?
An entry door handle, also known as external or front door handle, are simply door handles that are used on doors that lead to the outside of your house and require a high secuirty lock. This may be the front entry door, or even a side, launry or garage door, any that requires a lock. 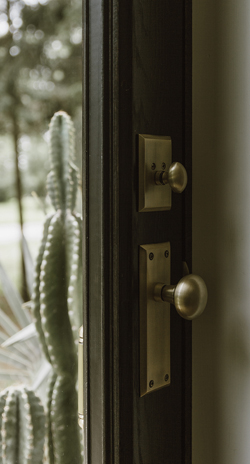 Today, there are three common types of entry handles; Lever handles or door knobs would be the most common. For external doors, either a separate 'deadbolt' (on today's market you can even purchase "smart" objects which can be controlled remotely or with another smart device) to lock the door or have a keyhole in the backplate of the handle, above or below the lever or knob. When the correct key is inserted into the keyhole in the backplate or into the deadbolt & is turned it will engage an internal mechanism which will lock & unlock the door. The lever or knob itself operates a separate latch, so that you can close the door without locking it; The next most common would be what is called an Entry Handlesets, this in particular is a huge change from 10 years ago. Entry Handle sets come with a pull handle with a thumb latch on the outside of the door and either a lever or knob on the inside. When these are used, they engage a tounge latch which allows the door to be latched closed without the door needing to be locked. The pull handle and knob are also accompanied with a deadbolt, often seperate, although sometimes incorporated into the backplate of the handleset, which is used to lock the door.
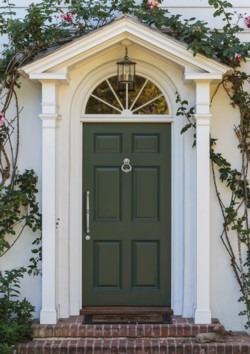 Finally, would be pull handles. In order to use a pull handle as a entry door handle, a separate 'deadbolt' would need to be used to lock the door. This is not unlike levers or knobs. The main difference with a pull handle is in order to use the door when it is not locked, you will need something called a 'roller lock'. These locks instead of having a tongue latch operated by turning the handle, it instead had a small ball roller with a tension spring which holds the door in a closed position but with a small amount of force, allows you to push open the door. Most entry door handles have an option of either a keyhole on both sides, or a thumbturn on the inside. A thumbturn can make it more convenient, as you don’t need a key to lock/unlock the door from the inside - however if there is glass in the door it can make it easier for intruders to break in, so this is something to consider.
Door Knobs & Lever Handles
So let us start with the most common type of handle, levers & knobs. For external or locking doors, there are a few different functions available if you're looking to use a lever or knob as your door handle.
+ What are the different types of door handles?
In Part Two of our DIY series we discussed the different types of internal door handles (Passage, Privacy and Dummy). We will now explain the options for external door handles.
Euro handles are the most common type of external door handles. These handles have three parts:
• Pair of Euro Handles; • a Euro Lock; • and a Euro Cylinder.
The Euro lock sits inside the door itself, behind the handle (which is installed on the door face), and similar to a normal passage handle, the lock includes a tongue latch, which is operated when tuning the door handle. It also includes a locking bolt, which is operated by a euro cylinder which is inserted through the lock and has a modern keyhole on one end and either another keyhole or a thumbturn on the other. Euro cylinders contain a number of pins of different lengths, the 'upper pins' all need to align in order for the key to turn in the cylinder barrel which means only the correct key fits in the cylinder and can unlock it. The more pins inside a cylinder, the more secure and harder to lock-pick that cylinder is. Once the correct key is inserted into the barrel and turned, the 'cam' of the cylinder will turn, engaging the locking bolt in the Euro lock. A second type of external door handle is a Traditional Keyhole handle. This type of handle and lock system is often seen in older homes. It uses a large, old fashioned skeleton key that inserts into a traditional mortice lock. Unlike a Euro lock, Mortice locks do not have a cylinder, but instead when you insert the key, it goes directly into the lock body. The correct key when inserted abd turned, will engage a number of 'levers' which will engage or disengage the locking bolt. The number of levers indicates the level of security of the lock. For example, our most popular door handle brand, Tradco Hardware, has two different security level mortice locks, 3 lever, and 5 lever. The 5 lever locks are high security, whereas the 3 lever locks are more suitable for lower security doors.
If your external doors are French Doors, you’ll want to check if these doors are rebated - if they have a zig zag cut-out along the edge of the doors that make the doors overlap when closed.
If they are, make sure you select the rebated lock option, which is available for both Euro and Traditional Keyhole handles. You may also want to add dummy handles to the non-active door, so that the doors look symmetrical, as well as flush bolts to hold that door in place and secure the doors when locked. Like with internal door handles, the backset of your door could be very important. If you need more information about backsets, you can visit our 'Measuring Your Backset' page here.
+ Can I use an interior door handle on an exterior door?
What makes a door handle external? Though some may assume it has to do with the material of the handle, which may in some cases be true, for us, an external door handle is simply one that has a hight security lock. Our 'internal' door handles such as our passage handles, do not have a locking function and therefore, generally you will not want to use these on an external door. However, if you are using a passage handle in conjunction with a separate deadbolt, then this is fine for use on an external door. The deadbolt will handle the locking & unlocking of the door and the passage handle will just function as any other handle throughout your house, where you turn the handle to open & close the door.
Pull Handles
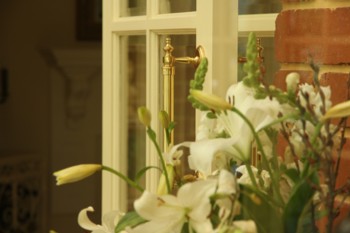
Pull handles are a great option when you are looking for something that's a little different. Pull handles can range from minimalistic, contemporary designs to large and grand Victorian or Gothic styles. They are a great option leading out onto a outdoor entertaining or patio area, on doors that you may need to get through with your hands full of trays bound for the BBQ.
+ How do front door pull handles work?
Pull handles by nature are designed to be pushed or pulled to open or close a door. These handles are installed are often installed on a door with a door closer which keeps the door fixed in a closed position until force is put onto the door to push or pull it open, however in a residential setting, these door closers are not the thrilling addition to your decor that you might hope for. There is of course, always a way, however, and in this case, the common fix to this problem is a roller bolt. These roller bolts essentially works the same way as a tongue latch for a lever handle or knob, but instead of a tongue that retracts when the handle is turned, instead it has a adjustable tension ball roller. This roller slots into place to hold the door closed, and similarly to a door closer, when force is put onto the door, the roller tongue rolls out of its place, allowing the door to open. For external doors, you would use a roller lock, which in addition to the roller tongue, it also incorporates a Euro lock. Pull handles can come in a range of fixing options, from face fix (screw in from the face of the door), rear fix (screw in from the back of the door, concealed (fixing screws are not visible once installed) & back-to-back (a set of handles for both sides of the door that connect to each other to attach to the door). They can be installed back to back, however you’ll want to take note of how they fix to the door. Most common for external doors would be handles with back-to-back fixing options, so a handle can easily be installed on each side of the door. For a fully functional and locking set of external pull handles, you will need:
• A set of pull handles (generally one for each side of the door); • A roller lock; • A Euro cylinder; • And a set of Euro escutcheons (one for each side of the door).
Please Note: Some Pull handles and Escutcheons are sold individually, and some as a pair. Any items sold as a pair on Restoration Online will note this in the product title.
There are also a small range of pull handles with cylinder hole which are a decorative outer pull handle that are designed to be used with a standard deadlatch or nightlatch such as the Lockwood 001.
Entry Door Handlesets
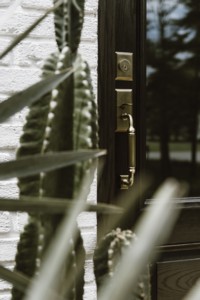
A popular alternative to a regular lever or knob external door handle is an Entry Door Handleset. Rather than having an identical handle on both sides of the door, these consist of a pull handle on the outside of the door and a knob or lever on the inside. They include a deadlock for high security locking, and a thumb latch above the pull handle which allows you to open the door from the outside when unlocked. In some of these handlesets the deadbolt and the pull handle are connected on one long plate, with others they are separate pieces, but regardless they will function the same. Entry Door Handlesets come in both simple and quite ornate designs, perfect if you are wanting to create an impactful first impression with a more unique handle.
Rim Locks, also known as Carpenters Locks, are a very traditional style of lock, used most commonly on internal doors such as bedrooms and studies, before modern privacy locks were available. They look like a metal box attached to the face of the door, and have a door knob on them. This lock box is installed on the ‘inside’ of the door, or on the side that swings towards you when opening. On the opposite side of the door, there is just a door knob and an escutcheon (key plate). 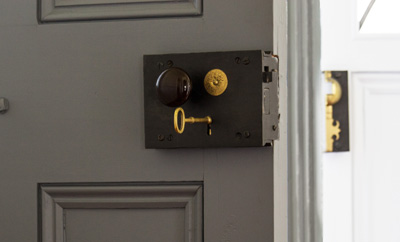 These are most often purchased to replace existing rim locks that have aged and look dated or painted over. A beautiful new rim lock, knobs and escutcheon can really give a door the appearance of a full makeover. Rim Locks don’t tend to vary too much in size, so you generally should be able to find an option in the exact size when replacing your old one. If the same size is not available, you’ll want to choose the size slightly larger, as this will cover any holes or marks left behind. Keep in mind these are low security locks and not designed for external doors.
Drop-in sinks, also known as inset sinks, are installed with the lip of the sink on top of the bench. This design means they are fairly easy to install, and perfect for when you need to replace an old sink.
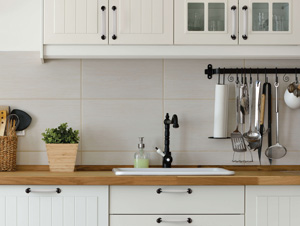
Drop-in sinks don’t require any support other than the bench top that the lip rests on. Our range of drop-in sinks come in white or black fireclay, aged copper, stone, stainless steel and vitreous china. To choose the correct size, you’ll want to look at the specifications of the sink you’re interested in. These will show both the length and width of the lip around the sink, as well as the dimensions of the drop in section of the sink. The hole in your bench top needs to be in between these sizes, so that the sink can easily drop through but the lip still sits on top of the bench. 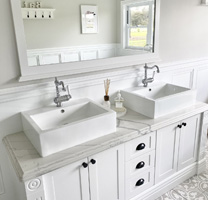 Above counter sinks are great for making the most of your under bench storage. These are most commonly installed in a bathroom, and are mounted to the vanity or bench top using a silicone seal around the bottom edge of the sink and the benchtop to prevent moisture from collecting underneath the sink. When using an abover counter sink, you will want to take into account the height of the sink and the height of the cabinet in unison as vanities are often designed for use with drop-in sinks. Choose from our range which includes ceramic, copper and glass options in a range of shapes and sizes.
Waste Fittings
Generally your sink will come included with an appropriate waste fitting, however you may need to purchase one separately if you’re replacing an old existing one, or if you want to swap to a different colour. We have a range of finishes, such as stainless steel, brushed gold, matte black and brushed nickel, to suit different sizes of kitchen and bathroom sinks. Our selection includes basket wastes, pop up wastes, plug and wastes with chains and two piece plug and wastes. To select the right size, you’ll need to measure the hole in your sink, and the indented part around the hole, known as the flange. You’ll then need to choose a waste fitting that has a neck narrow enough to fit in the hole, but flares out to a point wide enough to sit comfortably within that flange. All of our waste fittings either have specs images showing these measurements, or they will indicate the size hole they are suited to. If you are unsure, our team is here to help you. Some waste fittings are suitable only for stainless steel sinks, others include an extended screw that allows them to be installed on a fireclay sink, which has a thicker base. Ensure you are choosing the right kind of waste fitting for your sink.
When installing the waste fitting it is important to use some silicone sealant between the stainless steel waste flange (the part that you will see in the sink around the plug) and the glazed sink itself. This is to stop water from draining under the flange when the sink is filled. If surfaces are cleaned with a cloth dampened with Mineral Turps the silicone adheres very well. Use the same cloth to clean up any excess silicone that squeezes out when the waste fitting is tightened. Ensure that the silicone is cleaned up before it dries. Importantly, care must be taken not to over-tighten the waste fitting. The fitting should be tightened by hand from underneath the sink. If a screwdriver is used to tighten the screw in the centre of the waste fitting care should be taken not to use excessive force. If the fitting is over-tightened the sink could crack as a result - something that is not covered by warranty.
Bottle Traps
Our range of bottle traps are perfect for sinks that have the under-sink area exposed. Choose a bottle trap that matches the rest of your tapware and bathroom accessories - these little details can really bring a room together! A bottle trap contains an inner tube which functions as a barrier and prevents sewer gas from escaping into the atmosphere out of the drain hole of your sink. You can choose between S Traps or P traps, named because of their shapes. Both work in similar ways, however S Traps can tend to go dry over time if a sink is rarely used, which can cause unpleasant smells. This should not be a problem when a sink is used frequently, but we recommend checking with your plumber.
If there is anything unusual about your installation, please don’t hesitate to contact our team via phone, email or live chat with any questions you may have.
VIEW ALL
THE DIY GUIDES


